Security advisory (updated 3 November 2026): a firmware flaw in some Coldcard models, disclosed in July 2026, produced seeds with far less randomness than intended. Coinkite has released fixed firmware for every affected model, but updating does not repair a seed created on affected firmware. If you created a seed on a Coldcard, read who is affected and exactly what to do, or use the two-minute check. All current advisories: security advisories.
Affiliate disclosure: the BitBox02 link in the hardware list is an affiliate link (we may earn a commission). This tutorial recommended the same three-vendor combination before we joined BitBox’s affiliate program in June 2026. On 3 November 2026 we updated the discontinued models in it.
Why Use Multisig With Sparrow Wallet?
A single hardware wallet protects your bitcoin from remote attacks, but it introduces a single point of failure. If that one device is lost, damaged, or compromised, your funds are at risk. Multisig eliminates this weakness by requiring multiple keys to authorize a transaction. Even if one key is stolen or destroyed, your bitcoin remains safe.
Sparrow Wallet is the best desktop coordinator for multisig setups. It is open source, connects to your own node, supports every major hardware wallet, and gives you complete visibility into what your transactions actually do. This tutorial walks through creating a 2-of-3 multisig wallet using three different hardware wallets in Sparrow, then signing and broadcasting a transaction.

What You Need Before Starting
Hardware Requirements
- Three hardware wallets from different manufacturers — Using devices from different vendors protects against a supply chain compromise affecting a single manufacturer. A common combination: Coldcard Mk5 (or a Mk4 on current firmware), Trezor Safe 3 or Safe 5, and a Foundation Passport (the Core is discontinued; Passport Prime is its successor) or a BitBox02[#aff].
- A computer running Sparrow Wallet — Available for Windows, macOS, and Linux. Download from sparrowwallet.com and verify it before installing: check the PGP signature on the release manifest, then check that the installer’s SHA-256 hash matches the one in that manifest.
- Three separate seed phrase backups — Metal backups recommended. Each hardware wallet generates its own seed phrase independently.
For long-term savings we recommend a 2-of-3 multisig with devices from three different manufacturers, a passphrase, and seeds generated with 99+ dice rolls. Some devices mix your rolls with their own randomness; others, such as the BitBox02, use your rolls instead of it. If you use a BitBox02, keep its firmware up to date. Version 9.26.5 (17 August 2026) brought “security improvements”, according to BitBox’s release notes; if your device runs anything older, update it in the BitBoxApp. Details in our BitBox02 advisory.
Software Setup
Install a current Sparrow Wallet 2.x release (2.5.6 as of Nov 2026). Connect Sparrow to your own Bitcoin node or a public Electrum server. Your own node is strongly preferred for privacy — public servers can correlate your addresses.
Step 1: Initialize Each Hardware Wallet
Set up each hardware wallet individually before creating the multisig in Sparrow. Each device must:
- Have its firmware updated to the latest stable version, and the version confirmed on the device, before it creates any seed (on a Coldcard: set the PIN, update, then create the seed). Updating does not repair a seed made on affected firmware.
- Then generate its own 24-word seed phrase, from 99+ dice rolls where the device accepts them (never reuse a seed across devices).
- Be configured for multisig use (some wallets need this explicitly enabled).
During initialization, record each device’s master fingerprint (an 8-character hex string like a1b2c3d4). You will need these fingerprints to identify which device corresponds to which key in your multisig wallet. Sparrow displays them, but having them noted separately helps when troubleshooting.
Back up each seed phrase onto a separate metal seed backup and store them in different physical locations. The entire point of multisig is that no single location holds enough keys to spend funds.
Step 2: Export Extended Public Keys (XPUBs)
Each hardware wallet must export its extended public key for multisig. The XPUB allows Sparrow to generate all receiving and change addresses without needing the private key.
Coldcard Mk4 / Mk5
The Mk5 runs the same firmware as the Mk4, so the menus below are the same on both (COLDCARD docs, checked 3 Nov 2026).
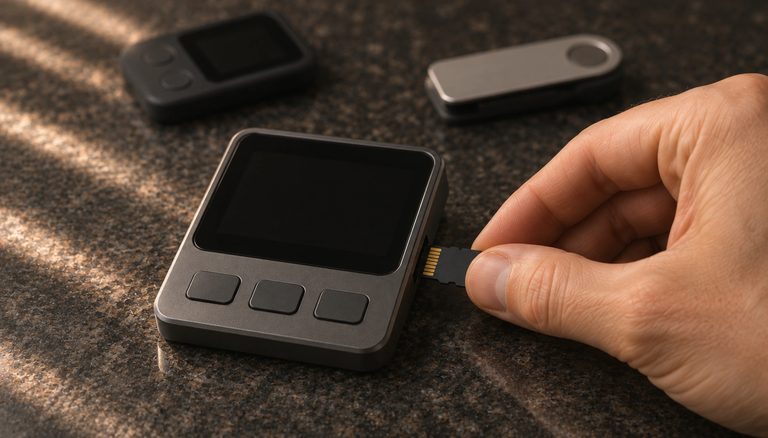
- Insert the microSD card into the Coldcard.
- Go to Settings → Multisig Wallets → Export XPUB.
- The Coldcard writes a file named
ccxp-<XFP>.jsonto the microSD (where<XFP>is that device’s master fingerprint, e.g.ccxp-0F056943.json). This is the file Sparrow expects for a multisig keystore. - Insert the microSD into your computer and, in the keystore step (Step 3), select Air-Gapped Hardware Wallet → Coldcard → Import File and choose the
ccxp-*.jsonfile.
Check the path, whichever export you use. On current Coldcard firmware, Sparrow 2.5.6 suggests Advanced/Tools → Export Wallet → Sparrow, and it keeps Settings → Multisig Wallets → Export XPUB for older firmware; both give Sparrow the multisig key. The Generic JSON export (coldcard-export.json) also carries a multisig section next to its single-sig ones. In Step 3, confirm that the Coldcard keystore shows the fingerprint you recorded and the multisig path m/48'/0'/0'/2' for Native SegWit. (Checked against the COLDCARD menu tree, updated 22 October 2026, and the Sparrow 2.5.6 source.)
Trezor
- Connect the Trezor to your computer via USB.
- Sparrow detects it automatically when you add a keystore (Step 3).
- No manual export needed — Sparrow pulls the XPUB directly via USB.
Foundation Passport Core
These steps are for the Passport Core, which Foundation no longer sells. This tutorial does not cover its successor, the Passport Prime: for the Prime, follow Foundation’s Passport Prime documentation.
- Go to Manage Account → Connect Wallet → Sparrow → Multisig → QR Code.
- The Passport displays an animated QR code containing the XPUB.
- Scan this QR code from within Sparrow during wallet creation.
The export method varies by device, but the result is the same: Sparrow receives the extended public key and derivation path for each signer.
Step 3: Create the Multisig Wallet in Sparrow
With all three XPUBs ready, create the multisig wallet:
- Open Sparrow and go to File → New Wallet.
- Name the wallet something descriptive like “Cold Storage 2of3”.
- Under Policy Type, select Multi Signature.
- Set the cosigners to 2 of 3.
- Select the script type. Native Segwit (P2WSH) is recommended for lower fees. Nested Segwit (P2SH-P2WSH) offers broader compatibility with older wallets.
Adding Keystores
Sparrow shows three keystore tabs: Keystore 1, Keystore 2, Keystore 3. For each one:
- Click the keystore tab.
- Choose the import method:
- Connected Hardware Wallet — for USB-connected devices (Trezor, Ledger).
- Air-Gapped Hardware Wallet — for devices that communicate via SD card or QR code (Coldcard, Passport).
- Follow the prompts to import the XPUB.
- Verify the master fingerprint matches what you recorded during initialization.
After importing all three keystores, Sparrow displays the wallet summary showing all three signers, the derivation paths, and the first few receiving addresses.
- Click Apply to save the wallet configuration.
- Sparrow prompts you to set a wallet password. This encrypts the wallet file on disk — it does not replace or modify the hardware wallet seeds.
Step 4: Verify Addresses on Hardware Wallets
This step is critical and often skipped. Before you deposit anything, check Sparrow’s receiving addresses on every device that stores the multisig wallet: here, the Coldcard and the Passport (or a BitBox02 if you use one). A Trezor can show an address too, but it cannot vouch for it; the Trezor section below explains why.

On Coldcard
- Export the multisig wallet configuration from Sparrow: Settings → Export → Coldcard Multisig.
- Save the
.txtfile to the microSD card. - On the Coldcard, go to Settings → Multisig Wallets → Import and choose the file on the microSD card.
- Review the policy (2-of-3), cosigner fingerprints, and derivation paths.
- Approve the import.
- Navigate to Address Explorer and verify the first few addresses match Sparrow. By default the Coldcard shows multisig addresses only in part; to compare them in full, first set Settings → Multisig Wallets → Full Address View? → Show Full.
On Trezor
Be honest with yourself about what a Trezor can and cannot do here. Trezor Suite does not manage multisig at all, and the Trezor firmware does not store a multisig wallet registration on the device the way a Coldcard stores the imported config, or the way a BitBox02 stores a checksum of all cosigner XPUBs. There is no trusted, on-device policy for the Trezor to check a receiving address against.
As a result, a Trezor cannot independently confirm a multisig receiving address on its own screen. If you use Sparrow’s Display Address on a Trezor keystore, the device is being told the multisig policy by Sparrow on the spot — it has nothing of its own to verify against, so a compromised coordinator could feed it a fabricated address. Treat the Trezor as a signer only, not as an independent address verifier.
Practical consequence: anchor your address verification on the device(s) that do store and check the config — your Coldcard (and Passport or BitBox02 if present). When at least one such device, with the multisig registered on it, shows the same address as Sparrow, that address is verified. The Trezor signing the spend later is fine; just do not rely on it to vouch for a receive address.
On Passport Core
- Make sure the Passport holds the wallet configuration. During the multisig connection flow it asks you to scan or import it from Sparrow (Settings → Export → Passport Multisig); if you skipped that, import it on the Passport under Settings → Bitcoin → Multisig → Import from QR Code.
- Open Verify Address (under Account Tools) and choose the multisig wallet.
- Scan Sparrow’s receiving address; the Passport confirms whether it belongs to that wallet.
If any device shows an address different from Sparrow’s, or the Passport says Sparrow’s address is not in the wallet, stop. Something is wrong with the configuration — do not deposit funds until every device that stores the wallet agrees with Sparrow.
Step 5: Receive Bitcoin
In Sparrow, go to the Receive tab. The displayed address is a P2WSH (or P2SH-P2WSH) address that requires 2 of your 3 keys to spend. Send a small test amount first (10,000–50,000 sats) and verify the transaction appears in Sparrow and is confirmed.
Each time you receive funds, use a new address. Sparrow generates sequential addresses from the extended public keys. Address reuse degrades privacy, which is especially relevant for a long-term storage wallet.
Step 6: Send Bitcoin — The Signing Flow
Sending from a multisig wallet requires creating a partially signed bitcoin transaction (PSBT) and getting two of three signers to sign it.

Create the Transaction
- Go to the Send tab in Sparrow.
- Enter the recipient address and amount.
- Set the fee rate based on current mempool conditions. Sparrow shows fee estimates from your connected node.
- Click Create Transaction.
- Review the transaction details: inputs, outputs, fee, and change address.
- Click Finalize Transaction for Signing.
Sign with the First Device
Sparrow shows the unsigned PSBT. Sign with the first hardware wallet:
- USB-connected device (Trezor): Click Sign next to the Trezor keystore. Sparrow communicates directly. Confirm the transaction details on the Trezor screen.
- Air-gapped device (Coldcard): Click Save Transaction to export the PSBT to a microSD card. Insert into the Coldcard, navigate to Ready to Sign, review details, and approve. Save the partially signed PSBT back to the SD card and load it into Sparrow.
- QR-based device (Passport): Click Show QR to display the PSBT as an animated QR code. Scan with the Passport, review and sign, then scan the resulting signed QR code back into Sparrow.
Sign with the Second Device
After the first signature, Sparrow shows 1 of 2 required signatures applied. Repeat the signing process with a second hardware wallet using whatever method that device supports (USB, SD card, or QR code).
With 2 of 3 signatures applied, Sparrow enables the Broadcast Transaction button. Review one final time, then click Broadcast. If Sparrow doesn’t use Tor, the transaction goes out through the server it connects to, ideally your own node. If it does use Tor (it turns Tor on by itself for a .onion server), it sends the transaction over Tor through public servers, which it says is more private, then waits for your server to see it.
Backup Strategy for Your Multisig
A multisig wallet requires more careful backup planning than a single-sig wallet. You must preserve:
- Each seed phrase — stored separately in different physical locations.
- The wallet configuration file — contains the XPUBs, derivation paths, and policy (2-of-3). Without this file, two seeds cannot rebuild the wallet, because the third key’s XPUB is missing; even with all three seeds, you would have to know or guess the policy, script type and derivation paths. Sparrow exports this from Settings → Export.
- A record of which device holds which key — map each master fingerprint to its storage location.

Store copies of the wallet configuration file alongside at least two of the three seed backups. The multisig backup maps guide covers optimal distribution strategies. For inheritance planning, the Bitcoin inheritance guide provides detailed frameworks.
Understanding the Wallet Descriptor
When you create a multisig wallet, Sparrow generates a wallet descriptor — a standardized string that encodes everything needed to reconstruct the wallet. It looks something like:
wsh(sortedmulti(2,[a1b2c3d4/48h/0h/0h/2h]xpub6.../<0;1>/*,
[e5f6a7b8/48h/0h/0h/2h]xpub6.../<0;1>/*,
[c9d0e1f2/48h/0h/0h/2h]xpub6.../<0;1>/*))#3k8xq2vd
This descriptor tells any compatible software: “This is a 2-of-3 Native Segwit multisig. Here are the three extended public keys, their derivation paths, and the master fingerprints of the signing devices.” With this descriptor and any two seed phrases, you can reconstruct the wallet in any software that supports output descriptors — including Bitcoin Core and Nunchuk.

Export the descriptor from Sparrow under Settings → Export → Output Descriptor. The file also lists the receive and change descriptors on separate lines, for software that takes them one at a time. You can save it as a text file, a QR code, or in wallet-specific formats. Store copies in multiple secure locations. Unlike seed phrases, the descriptor contains only public information — it reveals your addresses and balance but cannot authorize spending.
Monitoring Your Multisig Wallet
For long-term cold storage, you do not need the hardware wallets connected to check your balance. Open the Sparrow wallet file (protected by the password you set during creation) to see all addresses, balances, and transaction history. The hardware wallets are only needed when you want to sign a transaction to spend funds.
Sparrow’s Transactions tab shows the full history of the wallet. The Addresses tab displays every generated address and whether it has been used. The UTXOs tab shows each unspent output individually — this is particularly useful when you want to manage which coins you spend, a practice known as coin control that is essential for UTXO privacy management.
If you want watch-only access on your phone, you can import the wallet descriptor into a mobile wallet that supports multisig watching (Nunchuk, Blue Wallet, or Sentinel). This gives you balance notifications without exposing any signing capability on a mobile device.
Advanced Configuration
Using a Passphrase on One or More Keys
Adding a BIP39 passphrase to one of the hardware wallets creates a hidden multisig wallet. This adds plausible deniability — the base seeds without the passphrase derive a different (or empty) wallet. However, this adds complexity: you must back up the passphrase alongside its seed, and losing the passphrase is equivalent to losing that key. The passphrase best practices guide covers the trade-offs.
Connecting to Your Own Node
Under Settings → Server, configure Sparrow to connect to your own Bitcoin Core instance or Electrum server (Electrs, Fulcrum). This prevents address leakage to third-party servers. If you run a RaspiBlitz or Umbrel node, both provide Electrum server interfaces that work with Sparrow out of the box.
Using Different Script Types Across Keystores
All keystores in a multisig wallet must use the same script type: you cannot mix P2WSH and P2SH-P2WSH within a single wallet. Their derivation paths can differ, because the wallet descriptor records each cosigner’s path, but sticking to the standard path for the script type (m/48'/0'/0'/2' for Native Segwit multisig) keeps recovery simpler. If one of your hardware wallets has limited script type support, choose the most broadly compatible option (typically P2SH-P2WSH) or upgrade the device firmware to support Native Segwit multisig.
Troubleshooting Common Issues
Sparrow does not detect my hardware wallet
Ensure the device is unlocked and connected via USB. On Linux, you may need to add udev rules for your specific device. Sparrow’s documentation includes udev rule files for all supported hardware wallets. On macOS, check System Settings for USB permissions. Restart Sparrow after connecting the device if it was plugged in after launch.
Addresses do not match between devices
This indicates a configuration mismatch. Common causes: wrong derivation path, XPUBs imported in different order, or the multisig wallet not registered on the hardware device. Delete the wallet in Sparrow, verify each XPUB export, and recreate the wallet carefully. The order of keystores matters — Sparrow sorts them automatically for P2WSH, but registration on hardware devices must match.
Transaction signing fails
If a hardware wallet refuses to sign, verify that the multisig wallet is registered on that device with the correct policy. Some devices (notably Coldcard) require explicit multisig wallet registration before they will sign transactions. Re-import the wallet configuration file onto the device and try again.
PSBT file is too large for QR code
Transactions with many inputs produce large PSBTs that may exceed single QR code capacity. Sparrow uses animated QR codes (multiple frames) to handle this. Ensure both Sparrow and the hardware wallet support animated QR (BC-UR format). If the device does not support animated QR, use the microSD card method instead.
Frequently Asked Questions
What if one of my three hardware wallets breaks?
You can still spend with the remaining two devices since only 2 of 3 signatures are required. Replace the broken device, initialize it with a new seed, create a new 2-of-3 multisig including the replacement, and transfer funds from the old multisig to the new one. You can also restore the broken device’s seed onto a new device of the same model using the backed-up seed phrase.
Can I use three hardware wallets from the same manufacturer?
Technically yes, but it defeats a key benefit of multisig: hardware diversity. If a firmware vulnerability or supply chain attack affects one manufacturer, using three of their devices means all three keys could be compromised simultaneously.
Do I need Sparrow to spend from this wallet later?
You need a coordinator that understands the wallet configuration. Sparrow is the most user-friendly option, but you can also use Bitcoin Core or Nunchuk by importing the wallet descriptor or configuration file, or rebuild the wallet in Electrum by entering each cosigner’s extended public key in Zpub format (Electrum treats a plain xpub as a legacy P2SH multisig, which gives different addresses), then check that the first receive address matches Sparrow’s. The critical information is the XPUBs and the policy — any compatible software can reconstruct the wallet.
How do I verify I set everything up correctly?
After creating the wallet, send a small amount of bitcoin to the first receiving address. Then create a transaction spending those funds back to one of your own addresses, sign it with two devices, and broadcast. If the transaction confirms, your setup works correctly. Keep this test transaction small.
What derivation path should I use?
For Native Segwit multisig, the standard derivation path is m/48'/0'/0'/2'. Sparrow sets this automatically when you select the script type. Avoid custom derivation paths unless you have a specific reason — non-standard paths create recovery difficulties if you need to reconstruct the wallet in different software.
Can I add a fourth key to my existing 2-of-3 wallet later?
You cannot modify an existing multisig wallet’s policy. To change from 2-of-3 to 2-of-4 (or any other configuration), you must create a new wallet with the desired policy and transfer all funds from the old wallet to the new one. This is a deliberate security property — the spending conditions of a multisig address are fixed at creation time and enforced by the Bitcoin protocol. Plan your policy carefully before depositing significant funds.
How do I handle fee estimation for multisig transactions?
Multisig transactions are larger than single-sig transactions, which means they cost more in fees. A 2-of-3 P2WSH input weighs approximately 104 vBytes compared to roughly 68 vBytes for a single-sig P2WPKH input. Sparrow calculates the fee correctly based on the transaction size, including all signatures. When setting the fee rate, consider that cold storage transactions are rarely time-sensitive — you can often use a lower fee rate and wait for confirmation during a period of lower mempool congestion.

Can a Trezor verify a multisig receiving address on its own screen?
No. Trezor Suite does not manage multisig, and the Trezor firmware does not store a multisig wallet registration on the device — unlike a Coldcard, which stores the imported config, or a BitBox02, which stores a checksum of all cosigner XPUBs. Because the Trezor has no trusted on-device policy to check an address against, it cannot independently confirm a multisig receiving address. Use a Trezor purely as a signer, and anchor your receive-address verification on a device that does register the config (Coldcard, Passport, or BitBox02). (Verified June 2026.)
Which Coldcard menu exports the XPUB for multisig?
On a Coldcard Mk4 or Mk5 (they run the same firmware), Settings → Multisig Wallets → Export XPUB writes a file named ccxp-<XFP>.json (for example ccxp-0F056943.json) to the microSD. On current firmware, Sparrow 2.5.6 suggests Advanced/Tools → Export Wallet → Sparrow instead; both give Sparrow the multisig key, and the Generic JSON export carries a multisig section too. Whichever you use, check that the Coldcard keystore in Sparrow shows your fingerprint and the path m/48'/0'/0'/2'. (Checked against the COLDCARD menu tree and the Sparrow 2.5.6 source, November 2026.)