Why Multisig Matters for Bitcoin Security
Multi-signature (multisig) security represents the most robust approach to protecting significant Bitcoin holdings with hardware wallets. Unlike single-signature wallets where one compromised device means total loss of funds, a multisig configuration requires signatures from several independent keys to authorize any transaction. To steal your Bitcoin, an attacker would need to collect enough of those keys, whether from the devices themselves or from their seed backups.
The most common multisig setup for individual users is 2-of-3, which means you hold three signing keys across three separate hardware wallets, and any two of the three must sign a transaction for it to be valid. This provides an elegant balance: you can lose one device entirely — to theft, hardware failure, or natural disaster — and still access your funds with the remaining two devices. At the same time, an attacker who obtains a single device cannot move your Bitcoin.

More advanced configurations like 3-of-5 are used by institutions and individuals with very high-value holdings. The additional keys provide greater redundancy at the cost of increased operational complexity. Choosing the right multisig threshold depends on your specific threat model, the total value being protected, and your technical comfort level with managing multiple devices and backup materials.
Choosing Hardware Wallets for Multisig
A critical principle in multisig design is device diversity. Using hardware wallets from different manufacturers for each key in your multisig setup dramatically reduces the risk of common-mode failures — a vulnerability in one manufacturer’s firmware or hardware cannot compromise all your keys simultaneously.
For a 2-of-3 multisig, a strong configuration might include one Coldcard, one Trezor, and one BitBox02 (or similar combination). Each maker writes its own firmware and makes its own hardware choices. This diversity means that a flaw in one maker’s firmware, such as weak randomness or a signing attack like Dark Skippy, would reach only one of your three keys, and your funds would remain safe. The risk is real: in July 2026 a Coldcard firmware flaw made seeds generated on affected firmware far easier to guess (see our Coldcard advisory). Install a Coldcard’s fixed firmware before it makes a seed.

When selecting hardware wallets for multisig, prioritize devices that support PSBT (Partially Signed Bitcoin Transactions), as this is the standard protocol for multisig coordination. All modern hardware wallets designed for Bitcoin support PSBT, but verify that your chosen devices are compatible with your coordinator software. Sparrow Wallet and Electrum are the most widely used desktop coordinators for hardware wallet multisig.
Bitcoin-only firmware variants deserve serious consideration for multisig setups. By removing support for altcoins, Bitcoin-only firmware reduces the attack surface of the device and eliminates potential cross-protocol vulnerabilities. For a security-focused multisig configuration, every reduction in complexity strengthens the overall architecture.
Setting Up Your Multisig Wallet Step by Step
The setup process for a hardware wallet multisig begins with initializing each device independently. Each hardware wallet should generate its own unique seed phrase in a secure environment. Never reuse a seed phrase across devices, and never import an existing seed into a new device for multisig purposes — each key must be independently generated.
Step 1: Initialize each hardware wallet. Power on each device, follow the manufacturer’s setup procedure, and record the generated seed phrase on a metal backup. Verify the seed phrase backup by using the device’s built-in verification feature. Set a strong PIN on each device.
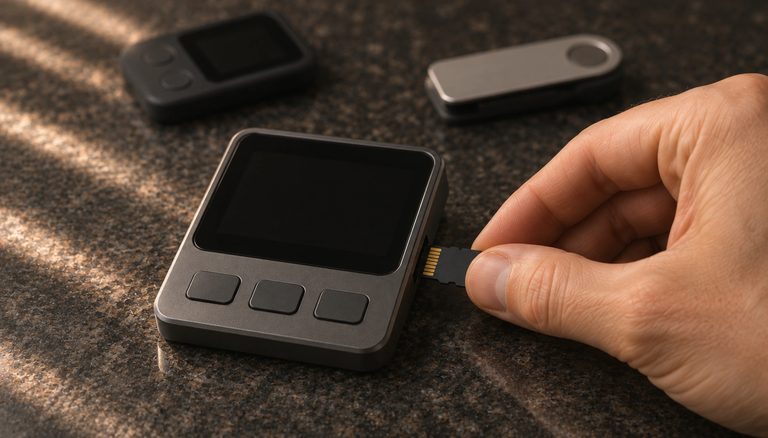
Step 2: Export extended public keys (xpubs) from each device. Each hardware wallet needs to export its extended public key, which allows the coordinator software to generate receiving addresses and monitor balances without accessing private keys. The xpub export process varies by device — some use USB connections, others use microSD cards or QR codes.
Step 3: Create the multisig wallet in your coordinator software. Open Sparrow Wallet (or your chosen coordinator), create a new multisig wallet, and import the xpubs from all three devices. Specify the threshold (e.g., 2-of-3). The coordinator will generate the multisig wallet descriptor, which defines the exact combination of keys and the rules for spending.
Step 4: Set the wallet up on each device. Every signing device needs to know the whole wallet before it can check an address or a payment. Some hardware wallets (like Coldcard and BitBox02) store the multisig configuration: you register it on the device once. A Trezor stores nothing: the coordinator sends it the other keys with every request. Either way, the device can then show addresses and recognize change on its own screen. A device that stores the wallet checks them against the wallet you registered, so a compromised coordinator can’t trick it with a different wallet. A Trezor uses whatever keys Sparrow sends, but it can show them, so you can compare them with the keys in your descriptor.

Step 5: Verify the first receiving address on each device. This is the most critical security step. Display the first receiving address on each hardware wallet and verify they all show the same address as the coordinator. If any device shows a different address, or refuses to show it, stop immediately — this indicates a configuration error or potential attack. The address verification confirms that all devices agree on the wallet structure. Also check that each device shows the threshold and number of keys you chose (for example, 2 of 3): a coordinator that adds its own key or lowers the threshold leaves the addresses matching.
Understanding Extended Public Key Security
Extended public keys (xpubs) play a crucial role in multisig security that many users underestimate. An xpub allows anyone who possesses it to derive all past and future receiving addresses for that key — and in a multisig context, an attacker who obtains all xpubs in a wallet can monitor the entire balance and transaction history.
While xpubs cannot be used to steal funds (they contain no private key material), their exposure represents a significant privacy leak. Treat your xpubs with the same care you would treat sensitive financial information. The wallet descriptor contains all of them, so keep it as private as your seeds: a copy goes with each seed backup (see below), and any digital copy should be encrypted.
The verification of xpubs across devices during setup is critical for preventing a sophisticated attack where a compromised coordinator substitutes one of the legitimate xpubs with an attacker-controlled key. By verifying that the receiving addresses match across all devices, you confirm that each device recognizes all the correct xpubs and that no substitution has occurred. Matching addresses don’t reveal an extra key or a lower threshold, though, so also check that each device shows the policy you chose, such as 2 of 3.

Backup Strategy for Multisig
Multisig backup requirements are more complex than single-signature wallets. You need to backup not just each device’s seed phrase, but also the wallet descriptor that defines the multisig configuration. Without the descriptor, having two of three seed phrases is not sufficient to recover your wallet — you also need to know the derivation paths, the xpubs of all participants, and the exact multisig parameters.
For each signing device, create a metal backup of the seed phrase. Store these backups in separate geographic locations — a home safe, a bank safe deposit box, and a trusted family member’s secure storage, for example. The geographic separation ensures that no single physical event (fire, flood, theft) can compromise multiple keys simultaneously.
Store a copy of the wallet descriptor with each seed phrase backup, on paper or as a printed QR code. The descriptor alone can’t spend, and with one key lost, the two seeds you still have can’t rebuild the wallet without it. With a copy in every location, any two locations together hold everything needed. If you also keep digital copies, encrypt them.

Document your entire multisig configuration in a clear, step-by-step recovery guide. This guide should explain which devices hold which keys, where backups are stored, how to reconstruct the wallet in coordinator software, and how to sign and broadcast a transaction. This documentation is essential not just for your own reference, but for inheritance planning.
Signing Transactions in a Multisig Setup
Spending Bitcoin from a multisig wallet requires coordinating signatures across multiple hardware wallets. The process uses PSBT — a standardized format that allows a partially signed transaction to be passed between devices until the required threshold of signatures is reached.
The workflow typically proceeds as follows: create the transaction in your coordinator software (Sparrow Wallet), which generates an unsigned PSBT. Transfer this PSBT to your first hardware wallet — via USB, microSD card, or QR code depending on the device. The device displays the transaction details for your verification, and upon confirmation, adds its signature to the PSBT. Transfer the partially signed PSBT back to the coordinator, then repeat the process with a second hardware wallet. Once the required number of signatures is reached (2 in a 2-of-3 setup), the coordinator can broadcast the fully signed transaction to the Bitcoin network.

Always verify transaction details (recipient address, amount and fee) on each hardware wallet’s screen before signing. The device shows what it will really sign, but not whom you meant to pay: malware can swap the address before it reaches Sparrow, and then Sparrow and every device agree on the wrong one. Compare the full address on each screen with the one the recipient gave you, and the amount and fee with what you intended. If anything differs, do not sign.
Balancing Security with Practical Usability
The greatest risk in a multisig setup is often not a sophisticated attack but user error born from excessive complexity. A multisig wallet that is too complicated to use reliably can become a greater risk than a well-managed single-signature wallet — if you cannot confidently execute the signing process, you risk locking yourself out of your own funds.
Start simple. A 2-of-3 multisig with a device from a different maker for each key, coordinated through Sparrow Wallet, represents an excellent balance of security and manageability. Master this configuration before considering more complex setups. Practice the full transaction signing workflow with small amounts before moving significant holdings into the wallet.
Consider the succession planning implications of your multisig design. Your heirs or designated beneficiaries will need to access these funds if something happens to you. Can they locate the required number of devices and backups? Do they understand the signing process? A multisig setup that only you can operate defeats one of its key purposes — providing resilient, recoverable security.
For some users, a single-signature hardware wallet with a strong BIP39 passphrase provides adequate security with significantly less operational complexity. The passphrase creates a hidden wallet that offers plausible deniability and protection against physical theft, while requiring management of only one device and one seed phrase backup plus the passphrase. Evaluate your actual threat model honestly before committing to multisig.
Advanced Multisig Considerations
As you become comfortable with basic multisig operations, several advanced considerations can further strengthen your setup. Key rotation — periodically generating new keys and migrating funds to a fresh multisig wallet — limits the window of exposure if any single key has been compromised without your knowledge.
Geographic mobility presents unique challenges for multisig users. International travel with multiple hardware wallets attracts attention and creates custody complications at border crossings. Consider keeping one signing device at each location you regularly visit, or using a mobile-friendly signing device for the key you carry.
Integration with your own Bitcoin full node provides the highest level of privacy and verification for your multisig wallet. When your coordinator software connects to your own node rather than a third-party server, your transaction queries, balance checks, and address generation are never exposed to external parties. This is particularly important for multisig wallets holding significant value.
The multisig ecosystem continues to evolve with improved standards, better coordinator software, and more intuitive hardware wallet interfaces. What was once accessible only to technical experts is becoming increasingly practical for motivated individuals willing to invest the time to learn. The security benefits of distributing trust across multiple independent devices make multisig the gold standard for serious Bitcoin custody — and the effort to set it up correctly is an investment in the long-term security of your wealth.
Step-by-Step Guide: Creating Your First 2-of-3 Multisig Wallet
This condensed walkthrough covers setting up a 2-of-3 multisig wallet using Sparrow Wallet as coordinator with three hardware wallets from different manufacturers.
Step 1: Initialize all three hardware wallets independently. Power on each device (e.g., a Coldcard Q or Mk5, a Trezor Safe 3, Safe 5 or Safe 7, and a BitBox02; the older Coldcard Mk4 and Trezor Model T are no longer sold) and complete the manufacturer’s setup process. On the Coldcard, install fixed firmware before it makes the seed. Each device must generate its own unique seed phrase — never share or reuse seeds across devices. Record each seed on a separate metal backup. The BitBox02 saves its 24 words to a microSD card by default: choose to write them down instead (or show them later from the device settings). If you keep the card as well, it holds the key unencrypted, so keep it private and only ever put it into your BitBox. Set a unique PIN on each device. Label each device clearly (e.g., “Key 1 – Coldcard”, “Key 2 – Trezor”, “Key 3 – BitBox02”).
Step 2: Export xpubs from each device. Connect each hardware wallet to Sparrow Wallet one at a time. In Sparrow, go to File > New Wallet, name it (e.g., “Multisig-2of3”), select Multi Signature, set M-of-N to 2-of-3, and select the script type (Native Segwit / P2WSH is recommended). For Keystore 1, click “Connected Hardware Wallet”, connect your first device, and import its xpub. Repeat for Keystores 2 and 3 with the other devices. Alternatively, for air-gapped devices like Coldcard, export the xpub to a microSD card and import the file.
Step 3: Register the wallet on devices that store it. On the Coldcard, export the wallet from Sparrow (Settings > Export) as a Coldcard-compatible file, transfer it via microSD and register it; Coldcard requires this before it signs. Before you approve, check that its screen says Policy: 2 of 3. The BitBox02 asks you to register and name the multisig account the first time Sparrow shows a receiving address on it. The Trezor has nothing to register: Sparrow sends it the other keys with every request. A registered device can check on its own that future transactions belong to this specific multisig wallet, without trusting the coordinator.
Step 4: Verify the first receiving address on every device. In Sparrow, go to the Receive tab and generate the first receiving address. Display this address on each hardware wallet individually and confirm they all show the identical address: on the Coldcard use the Address Explorer, which by default replaces some characters in the middle of a multisig address with underscores (turn on the full address view under Settings > Multisig Wallets to see every character); on the Trezor and the BitBox02, Sparrow asks the device to show the address. If a device refuses, or shows a different address, stop. Also check that the BitBox02 and the Trezor show the policy as 2 of 3 (on the Trezor, open the account info from the address screen’s menu). Matching addresses prove no xpub substitution has occurred, but a compromised coordinator could add its own key as a fourth or lower the threshold, and every device would still show the same address. Together, these checks are the single most important security step.
Step 5: Fund with a test transaction. Send a small amount of Bitcoin (e.g., 50,000 sats) to the verified receiving address. Wait for confirmation. Verify the balance appears in Sparrow. Then create a spend transaction: in Sparrow, go to Send, enter a destination (your own address on another wallet), set the amount and fee, and click Create Transaction. This generates an unsigned PSBT.
Step 6: Collect two signatures. Sign the PSBT with your first hardware wallet — connect it to Sparrow and click Sign, or transfer the PSBT via microSD/QR code for air-gapped devices. After the first signature, repeat with a second device. Once two of three devices have signed, Sparrow shows the transaction as fully signed. Click Broadcast to send it. Verify the transaction confirms on the blockchain.
Step 7: Store a copy of the wallet descriptor with each seed. Export the wallet descriptor from Sparrow (Settings > Export > Output Descriptor) and keep a copy, on paper or as a printed QR code, with each of the three seed backups. With one key lost, the two seeds you still have can’t rebuild the wallet without it. Any digital copy should be encrypted.
Warning: Never skip the address verification step (Step 4). A compromised coordinator could substitute an attacker’s xpub for one of yours, creating a wallet where the attacker holds one of the three keys. In a 2-of-3 setup, the attacker would then need only one additional key to steal funds. Cross-device address verification prevents this attack entirely.
Common Mistakes to Avoid
Not backing up the wallet descriptor. This is the most common fatal mistake in multisig. You have three seed phrases backed up on steel, but you forgot to save the wallet descriptor that defines how those seeds combine into a multisig wallet. Without the descriptor (which includes all xpubs, derivation paths, and the threshold), two of your seed phrases cannot reconstruct the wallet. Keep a copy with every seed backup.
Using the same manufacturer for all devices. Using three Ledger devices or three Trezors in a multisig eliminates the key benefit of device diversity. A single firmware vulnerability could compromise all three keys simultaneously. Use a different maker for each key, so that no single vendor’s security failure can reach the two keys a thief needs.
Making the setup too complex to operate reliably. A 3-of-5 multisig across five manufacturers with air-gapped signing and geographic distribution sounds impressive on paper, but if you cannot reliably execute a signing ceremony when needed, you risk locking yourself out. Start with 2-of-3, master the workflow, and only increase complexity when you are confident in your operational procedures.
Skipping the test spend. Receiving funds into a multisig wallet is easy. The real test is spending from it. If your signing workflow is broken (wrong derivation path, incompatible device, corrupted descriptor), you will not discover this until you try to spend. Always complete a full send-receive-send cycle with a small amount before depositing significant funds.
Frequently Asked Questions
What happens if one of my three hardware wallets breaks?
In a 2-of-3 multisig, you can still spend with the remaining two functional devices. However, you should promptly restore that key’s seed phrase onto a replacement device that accepts its kind of backup (a Trezor’s default 20-word backup needs another Trezor or a wallet that supports SLIP-39), then set the existing wallet up on it again (register it, if the device stores multisig wallets). The wallet and its addresses don’t change. Operating at reduced redundancy (effectively 2-of-2) leaves you with no margin for error on the remaining devices.Can I use a software wallet as one of the keys in multisig?
Technically yes, but it significantly weakens the security model. The entire point of hardware wallet multisig is that private keys never touch an internet-connected device. Introducing a software wallet key means that one of your three keys is only as secure as the computer or phone running that software. If you must use a software wallet key, ensure it runs on a dedicated air-gapped computer.How much does it cost to set up a multisig wallet?
The hardware cost is three hardware wallets from different makers. At the makers’ own stores in November 2026, for example, a Trezor Safe 3 costs $59, a BitBox02 €149 (BitBox’s EU store) and a Coldcard Mk5 $269 ($219 on sale); prices change often, so check before you buy. You also need metal backup plates for three seed phrases ($30-100 each). Software (Sparrow Wallet) is free. On-chain transaction fees apply when funding the wallet and spending from it. A native SegWit (P2WSH) 2-of-3 spend is about 190 virtual bytes against about 141 for an ordinary single-key wallet, so each spend costs roughly 1.3 to 1.5 times the fee. For significant Bitcoin holdings, these costs are small next to the security they buy.Can I add a fourth key to my 2-of-3 multisig later?
No. Changing the multisig configuration (adding keys or changing the threshold) requires creating an entirely new wallet and transferring funds to it via on-chain transactions. You cannot modify an existing multisig wallet’s parameters. Plan your multisig structure carefully at the beginning, though remember that migrating to a new configuration is always possible — just not free (it costs transaction fees).Related Resources
- Dark Skippy Attack: Is Your Hardware Wallet Safe?
- Bitcoin Seed Phrase Storage: Best Practices
- Multi-Signature Wallet Setup: Security and Portability
- Multisig Wallet: Security vs Usability
- Singlesig to Multisig Bitcoin Migration