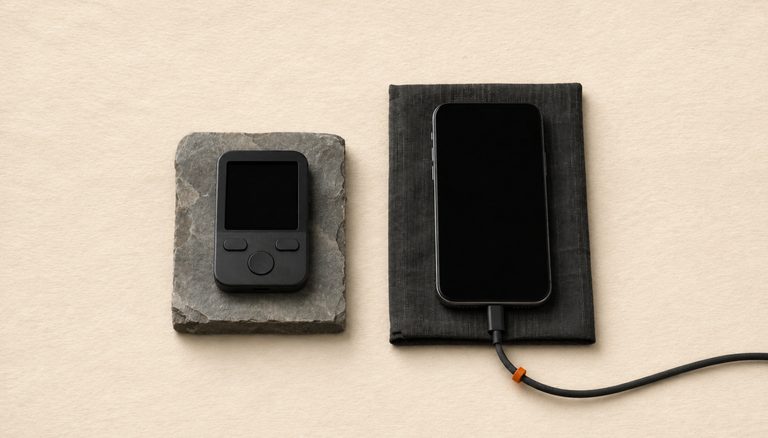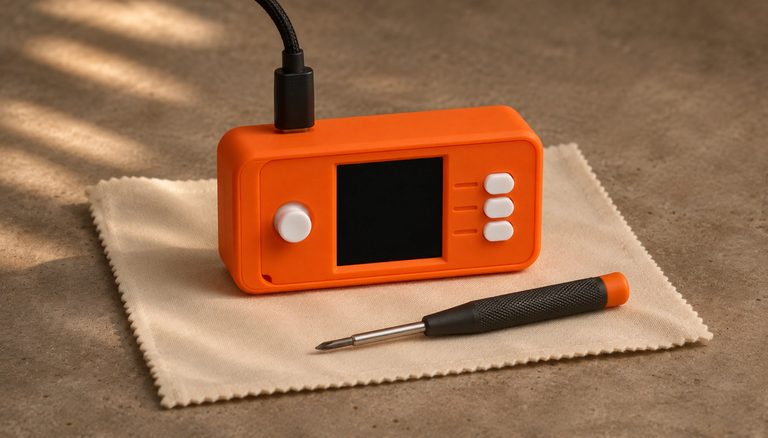
The evolution of Bitcoin self-custody solutions has given rise to an important focus on air-gapped signing devices, representing a crucial development in cryptocurrency security. These devices serve as a critical bridge between the necessity of transaction signing and the imperative of keeping private keys isolated from potentially compromised networks. This analysis explores the technical considerations, security implications, and practical challenges in implementing air-gapped signing solutions.
The fundamental principle behind air-gapped signing devices stems from a core security maxim: private keys should never be exposed to networked environments. This approach creates a physical security barrier that significantly reduces the attack surface for potential exploits. While commercial hardware wallets implement this concept through specialized hardware, DIY solutions offer unique advantages in terms of transparency, customization, and security verification.
When examining the hardware requirements for air-gapped signing devices, the distinction between networked and non-networked components becomes paramount. Single-board computers (SBCs) with built-in wireless capabilities present a particular challenge, as their networking features represent potential security vulnerabilities. Even when disabled through software, the mere presence of these components raises security concerns due to the theoretical possibility of remote exploitation or firmware-level compromises.
The security architecture of air-gapped signing devices must consider multiple layers of potential vulnerability. Hardware-level security begins with the physical components themselves, where the presence or absence of networking capabilities represents the first line of defense. This extends beyond mere wireless connectivity to encompass all potential communication channels, including Bluetooth, NFC, and other radio frequencies that could theoretically be exploited for data exfiltration.
Software-based solutions for disabling network interfaces present a complex security trade-off. While software controls can effectively disable communication interfaces in normal operation, they rely on the integrity of the operating system and firmware. This creates a dependency chain that could potentially be compromised through sophisticated attacks. The principle of defense in depth suggests that hardware-level isolation provides stronger security guarantees than software-based controls.

Storage Media for Air-Gapped Devices
The role of removable storage in hardware wallet and DIY signing systems extends far beyond simple data retention. These components serve as crucial bridges between air-gapped devices and connected systems, enabling secure transaction signing via PSBTs while maintaining critical security boundaries. MicroSD cards are the most common medium, and their reliability directly impacts custody security. On a SeedSigner the card plays a smaller part: it holds the software, which loads into memory at start-up, and, only if you turn on the optional persistent settings, a file of your settings. It never holds your seed, and transactions travel by QR code.
Industrial-grade storage media typically incorporates several enhanced features compared to consumer variants: improved temperature tolerance, better vibration resistance, enhanced write endurance, and more robust error correction capabilities. While the specific storage requirements for signing devices tend to be modest - even complex multi-signature setups require minimal space - reliability and compatibility are more important than capacity.
Compatibility considerations extend beyond simple physical form factors. File system support, partition schemes, and low-level storage protocols all play crucial roles in ensuring seamless integration. Most modern hardware wallets implement robust compatibility layers, but DIY builders should verify support for their chosen media and file system format.
Supply Chain Security and Component Sourcing
Supply chain security represents a critical consideration in the implementation of air-gapped signing devices. Pre-assembled units, while convenient, introduce potential vectors for compromise through modified hardware or firmware. The security implications extend beyond the device itself to encompass the entire chain of custody from manufacturing to deployment.
The challenge of component availability adds another layer of complexity. The scarcity of specific hardware components forces considerations of alternative approaches, each with its own security implications. This scarcity has led to the emergence of pre-assembled solutions, which introduce additional trust considerations. When sourcing components for DIY builds, purchasing directly from manufacturers or authorized distributors minimizes the risk of tampered parts.

Complete System Architecture
The implementation of air-gapped signing solutions requires careful consideration of the complete system architecture. This includes not only the primary computing unit but also peripheral components such as displays, input devices, and power supplies. Each component must be evaluated for potential security implications, with particular attention to any features that could compromise the air-gap integrity. Users must also consider secure storage of backup devices, protection against environmental factors, and protocols for media replacement.
Looking forward, the development of air-gapped signing solutions continues to evolve alongside advances in hardware security. The trend toward open-source hardware and software solutions provides opportunities for community verification and security auditing, while also enabling customization for specific security requirements. The future of secure transaction signing likely lies in a combination of hardware-level security features and verifiable open-source implementations.
Step-by-Step Guide to Building a DIY Bitcoin Signing Device
Building your own Bitcoin signing device from off-the-shelf parts and open-source software reduces supply chain risk and gives you full control over every hardware and software component. This guide covers a SeedSigner build using commodity hardware.
Step 1: Source the required components. Purchase a Raspberry Pi Zero 1.3 (the version without WiFi or Bluetooth), a Waveshare 1.3-inch LCD HAT (240×240 pixels), a Pi Zero-compatible camera module, and a microSD card (any size works: the project asks for at least 64 MB). Buy the Raspberry Pi directly from an authorized distributor to minimize supply chain tampering risk. The Pi Zero 1.3 is specifically chosen because it lacks wireless hardware at the circuit level.

Step 2: Download and verify the SeedSigner software. From the releases page of the official SeedSigner GitHub repository, download three files: the image for your board (the one ending in pi0.img for a Pi Zero 1.3), the checksum list (.sha256.txt) and its signature (.sha256.txt.sig). First check the signature with GPG and SeedSigner’s public key, fetched from keybase.io/seedsigner: the result must say “Good signature”, and the 16-character key ID that GPG prints must match the one on SeedSigner’s Keybase page, which Keybase ties to SeedSigner’s GitHub account and website. Then, in the folder with your downloads, check your image against the list with shasum -a 256 --ignore-missing --check seedsigner.0.8.7.sha256.txt (use the version number of the list you downloaded): the line that names your image must end in OK. (--ignore-missing skips the images for other boards that you didn’t download.) A checksum on its own only proves your copy matches the list; the signature proves the list came from SeedSigner. The project’s README gives the exact commands, and How to Verify Bitcoin Software Before You Install It explains the idea.

Step 3: Write the software to the microSD card. Use Balena Etcher or Raspberry Pi Imager, the two tools SeedSigner recommends, or dd on Linux if you are used to it. On Linux, the command is: sudo dd bs=4M if=seedsigner_image.img of=/dev/sdX conv=fsync status=progress, where /dev/sdX is the whole microSD card, not a partition such as /dev/sdX1. To find it, run lsblk before and after you insert the card and take the new device that matches the card’s size (a built-in card slot often shows as /dev/mmcblk0). Check it twice: dd overwrites whatever device you name. After flashing, eject the card properly to ensure all data is written.
Step 4: Assemble the hardware. The Pi Zero often comes without header pins: solder its 40 GPIO pins, or buy the board with headers already on. Then connect the LCD HAT to the header. Attach the camera module to the Pi Zero’s camera ribbon cable connector, ensuring the cable is seated firmly and oriented correctly (contacts facing the board). Optionally, mount the assembled components in a 3D-printed enclosure — STL files are available in the SeedSigner repository.
Step 5: Power on and verify operation. Insert the prepared microSD card and connect power via a USB power bank or battery pack. The SeedSigner logo should appear on the LCD after about 45 seconds. Navigate the menus using the HAT’s joystick and buttons to confirm all input controls function correctly. Test the camera by scanning a sample QR code.
Step 6: Generate or import a seed phrase. SeedSigner can generate a new seed phrase from a photo taken with its camera (photographing random objects), or from dice rolls: 99 for 24 words, 50 for 12. Alternatively, you can import an existing seed phrase by entering each word manually using the on-screen keyboard. If you generate a new seed, write the words down on paper or metal as the device shows them, check your copy with its Verify Backup option, and note the fingerprint shown on the Finalize Seed screen: the SeedSigner forgets the seed when you switch it off, so your written copy is the only place it is kept. SeedSigner can also guide you to copy your seed by hand onto a SeedQR, a QR code on paper that loads it in one scan next time, and check it with Confirm SeedQR; it is your seed in another form, so guard it like the words. After import, SeedSigner shows the wallet fingerprint. If that wallet uses a BIP39 passphrase, add the exact passphrase with the “BIP-39 Passphrase” button on that screen, since the words alone open a different wallet with a different fingerprint. Then verify the fingerprint matches your records.
Step 7: Export the public key to your wallet coordinator. Use SeedSigner’s QR code export function to display your wallet’s xpub as a series of animated QR codes. Scan these codes with Sparrow Wallet on your computer to create a watch-only wallet. This links your coordinator software to the signing device without ever exposing private keys to a networked device.
Step 8: Test the complete signing workflow. Before you send any bitcoin to the new wallet, test your backup: switch the SeedSigner off and on, load the seed from your written words or SeedQR, and check that it shows the fingerprint you noted. Then create a test transaction in Sparrow Wallet, export it as an animated QR code, scan it with SeedSigner’s camera, review and sign on the device, then scan the signed PSBT QR code back into Sparrow for broadcasting. Perform this end-to-end test with a small amount of bitcoin before relying on the device for significant holdings.

Common Mistakes to Avoid
Choosing a Raspberry Pi with built-in WiFi or Bluetooth when you could avoid it. SeedSigner runs on the Pi Zero W, Pi Zero 2 W, Pi 2, Pi 3, and Pi 4, but all except the Pi 2 include wireless hardware that creates potential attack vectors even when disabled in software. Firmware-level exploits could theoretically re-enable wireless interfaces. The Pi Zero 1.3 (non-W version), the board SeedSigner prefers, has no wireless components at all, so there is nothing to switch back on.
Purchasing components from unverified marketplace sellers. Third-party sellers on Amazon, eBay, or AliExpress may ship counterfeit or pre-modified components. A tampered Pi Zero could contain additional circuitry for data exfiltration. Buy from the Approved Resellers listed on the Raspberry Pi website or directly from the manufacturer.
Skipping software signature verification. Running unverified software on your signing device defeats the purpose of a DIY build. An attacker who compromises the software download could insert code that leaks your seed phrase through subtle means — for example, biasing the nonce in transaction signatures to encode key material that can be extracted from the blockchain.
Storing the seed phrase on the microSD card. SeedSigner is designed as a stateless signing device — it does not store seed phrases between sessions. This is a feature, not a limitation. You must enter your seed phrase each time you use the device. Never modify the software to store keys on the microSD card, as this would transform a secure signing device into a theft target.

Frequently Asked Questions
How does SeedSigner compare to commercial hardware wallets?
SeedSigner signs on-chain Bitcoin transactions offline, forgets your seed when you switch it off, and costs less than most commercial devices: the project puts the parts at under $50, while commercial hardware wallets run from about $60 to over $300 at the makers’ stores (November 2026). The tradeoff is usability — you load your seed each session, by typing the words or scanning a SeedQR, and the screen is smaller. Commercial devices like Coldcard offer additional features such as persistent key storage in a secure element, NFC communication, and built-in keyboard. SeedSigner excels as a secondary signing device in multi-signature configurations.
Can I use SeedSigner as my only signing device?
Yes, SeedSigner functions as a complete signing device. However, its stateless design means you must load your seed every time you switch it on, by typing all the words or scanning a SeedQR; typing adds time and risks entry errors. For daily use, many users prefer a commercial hardware wallet for convenience and reserve SeedSigner as a backup signing device or as one key in a multi-signature quorum.
What maintenance does a DIY signing device require?
Check for software updates on the SeedSigner GitHub repository monthly. When updates are available, download the new image, verify its signature, reflash the microSD card, and test the device. SeedSigner reads the card only at start-up, so there is no yearly replacement: swap it if the device stops booting or the image will not write. Keep the camera lens clean for reliable QR code scanning. Store the assembled device in a protective case when not in use.
Related Resources
- Dark Skippy Attack: Is Your Hardware Wallet Safe?
- Open Source Hardware Wallets: 2026 Analysis
- Air-Gapped Hardware Wallets: 2026 Guide
- Hardware Wallet Side-Channel Attack Risks
- Hardware Wallet Self-Custody: Full Guide