The evolution of Bitcoin wallet security has led to sophisticated solutions that balance robust protection with practical usability. Among these innovations, multi-signature (multisig) wallet implementations stand out as a cornerstone of advanced Bitcoin custody. This analysis explores the technical architecture, security implications, and recovery mechanisms of multisig systems, with particular attention to modern wallet implementations.
Multi-signature technology represents a fundamental shift from traditional single-key Bitcoin custody. Rather than relying on a single point of failure, multisig arrangements require multiple independent signatures to authorize transactions, implementing an M-of-N scheme where M signatures are needed from N total keys. This approach creates multiple layers of security while providing flexibility in key management and backup strategies.

The technical foundation of multisig wallets rests on Bitcoin’s native script capabilities, specifically the OP_CHECKMULTISIG operation. Modern wallet implementations build upon this base layer by incorporating BIP32 hierarchical deterministic key generation, allowing for sophisticated key management schemes while maintaining practical backup and recovery procedures. The integration of these technologies enables robust security architectures that can withstand the loss or compromise of individual keys while preserving access to funds.
A critical aspect of multisig wallet design is the backup and recovery framework. Unlike single-signature wallets where backing up a single seed phrase is sufficient, multisig setups require preservation of additional metadata, including extended public keys (xpubs), master fingerprints, and derivation paths. This complexity introduces both challenges and opportunities in backup strategy design.
The role of extended public keys (xpubs) in multisig architectures deserves particular attention. These keys enable watch-only wallet functionality and are essential for wallet reconstruction, even when not all private keys are available. The ability to recreate wallet structures using a combination of private seeds and public key information provides flexibility in recovery scenarios while maintaining security boundaries.

Modern wallet implementations have evolved to support sophisticated recovery mechanisms that don’t necessarily require all original seed phrases. This capability relies on careful preservation of wallet configuration data, including derivation paths and master fingerprints, alongside the minimum required number of private keys. The technical implementation must balance security considerations with practical recovery procedures.
The implications of partial key loss in multisig setups extend beyond immediate recovery concerns. While maintaining access with a subset of original keys may be possible, security best practices strongly recommend transferring funds to a fresh wallet configuration when key compromise is suspected. This approach ensures continued protection against potential future key exposure while maintaining the integrity of the multisig security model.
Looking toward future developments, the evolution of multisig implementations continues to focus on improving usability without compromising security. Emerging standards and protocols aim to simplify backup procedures while maintaining the robust security characteristics that make multisig arrangements attractive for serious Bitcoin custody solutions.
The practical implementation of multisig wallet recovery procedures requires careful attention to detail and thorough testing. Users must validate their backup and recovery procedures with small amounts before committing significant funds, ensuring familiarity with the process and confidence in their ability to execute recovery procedures under various scenarios.
As Bitcoin custody solutions continue to mature, the role of multisig arrangements in securing significant holdings becomes increasingly important. The ability to implement sophisticated security models while maintaining practical recovery options represents a crucial development in Bitcoin’s journey toward mainstream adoption and institutional acceptance.
Step-by-Step Guide to Setting Up and Documenting a Recoverable Multisig Wallet

- Acquire and Initialize Three Hardware Wallets from Different Manufacturers
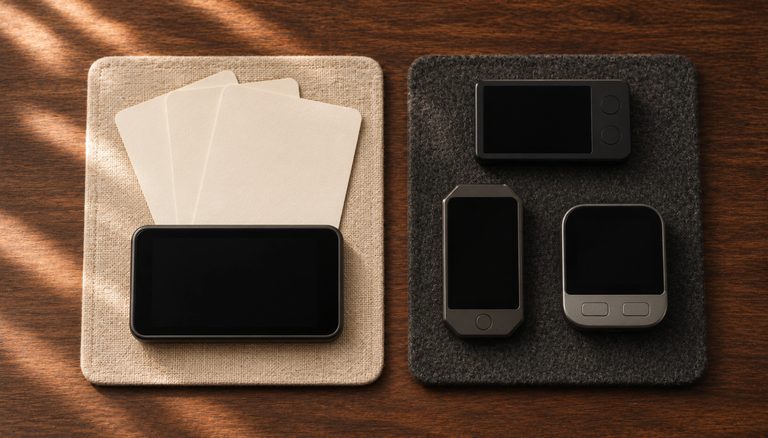
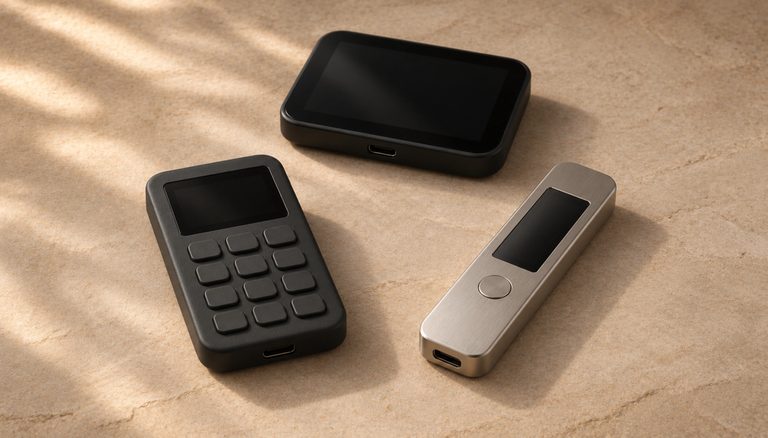
Buy one device from each of three makers, each from its maker’s own shop: for example a Coldcard Q or Mk5, a Trezor Safe 3, Safe 5 or Safe 7, and a Keystone 3 Pro (on pre-order in early November 2026). The multisig in practice lesson lists devices that work well together; the older Coldcard Mk4 and Trezor Model T are no longer sold. On the Coldcard, install fixed firmware before it makes a seed: seeds made on older Coldcard firmware can be guessed (see our Coldcard advisory). When each device arrives, check its tamper-evident packaging and set it up in a private, offline place. Let each device generate a fresh seed phrase; don’t import an existing one. Write down the words each device shows (a Trezor Safe gives 20 words by default, which works fine as one key of a multisig) and stamp each seed onto its own metal plate: paper degrades and burns.
- Export Extended Public Keys from Each Device
Connect each hardware wallet to your coordinator software (Sparrow Wallet is recommended for its strong multisig support). In Sparrow, go to File > New Wallet, select “Multi Signature” and configure 2-of-3. For each cosigner tab, connect the corresponding hardware device and import its xpub. Sparrow will display each device’s master fingerprint, derivation path (typically m/48'/0'/0'/2' for native SegWit multisig), and the xpub string. Record all three sets of information -- you will need them for the wallet descriptor backup.
- Create the Multisig Wallet, Set It Up on Each Device and Verify Addresses
Once all three xpubs are imported, Sparrow generates the multisig wallet. Next, make sure every device knows the whole wallet. The Coldcard and the Keystone store it: export the wallet file from Sparrow in the format each device expects and load it once (this is called registering it). The Trezor has nothing to load: Sparrow sends it the other keys with every request. Then, before depositing any funds, check the first receive address on each device’s own screen: on the Coldcard with the Address Explorer, on the Keystone in the wallet you loaded, on the Trezor with Sparrow’s option to show the address on the device. The Coldcard hides three characters in the middle of a multisig address unless you turn on its full address view in the Multisig Wallets settings; every character it does show must match. Each device has already checked that its own key is in the wallet, so check one more thing on their screens: that the wallet is 2 of 3 (the Coldcard and the Keystone show this when you register it, the Trezor under Account info on the address screen). If every device says 2 of 3 and its address matches the one Sparrow displays, the wallet is set up correctly. If any device shows something different, or refuses to show it, stop and troubleshoot before you go on.
- Export the Wallet Descriptor and Store a Copy With Each Seed
In Sparrow, go to File > Export Wallet and save the wallet’s output descriptor. It records all three xpubs, the derivation paths, the script type and the 2-of-3 threshold. With only two seeds, which is exactly the situation multisig is built for, you can’t rebuild the wallet without it. So store a copy with each seed backup, on paper or as a printed QR code beside each metal plate: any two locations then hold everything needed. The descriptor can’t spend, but it shows your whole balance and history, so keep it as private as the seeds. If you also keep a digital copy, encrypt it, for example with GPG:
gpg -c --cipher-algo AES256 wallet-descriptor.txt, and note where the passphrase is kept. - Create a Backup Map
Draft a document that records where each piece of backup material is stored without revealing the actual secrets. For example: “Key A (Coldcard): seed plate and a descriptor copy in the home safe. Key B (Trezor): seed plate and a descriptor copy in the bank safety deposit box. Key C (Keystone): seed plate and a descriptor copy in a relative’s safe.” This map allows you or your heirs to locate all necessary recovery components. Store the map separately from any seed phrases, in a location that is accessible but not immediately obvious.
- Fund with a Small Test Amount and Execute a Complete Spend Cycle
Send a small amount of Bitcoin (e.g., 50,000 sats) to the first receive address of your new multisig wallet. Wait for at least one on-chain confirmation. Then create a transaction spending from that address back to another wallet you control. Sign the PSBT with device A, the Coldcard, by SD card or QR code, and load the partially signed transaction back into Sparrow. Then connect device B, the Trezor, by USB and add the second signature from Sparrow. Broadcast the fully signed transaction. This end-to-end test confirms that your setup, signing workflow, and devices all function correctly together.
- Simulate a Recovery from Scratch
To validate your backup strategy, perform a full recovery drill. On a separate computer, install Sparrow fresh and, before it goes online, import the wallet descriptor from one of your copies. Verify that the wallet regenerates the same addresses as your original setup; Sparrow can do this offline. To sign a test transaction it needs the wallet’s coins, so connect it to your own node or private Electrum server: with no server set, Sparrow picks a public one at random, and that server would see every address in your wallet. Then connect two of your three hardware wallets and sign a small test transaction. That proves the descriptor rebuilds your wallet, but not that your seed plates are right, because the devices still hold their keys. So check each seed on its own too, with the device’s built-in backup check or on a spare hardware wallet, never by typing the words into a computer; our guide to testing a seed backup shows both methods. If both checks pass, your backups are confirmed viable. If either fails, identify and fix the gap immediately. When you are done, delete the test wallet from that computer: it holds a full copy of your wallet.

Common Mistakes to Avoid
Generating Seeds on an Internet-Connected Computer
Never use a software random number generator on a general-purpose computer to create seed phrases for a multisig wallet. Software environments are susceptible to malware, clipboard hijacking, and memory scraping. Always generate seeds directly on the hardware wallet device itself, which uses a dedicated hardware random number generator (TRNG) isolated from the host computer. If a hardware wallet does not generate its own seed internally, it should not be trusted for securing significant value.
Skipping Address Verification on Hardware Devices
After creating a multisig wallet, many users accept the receive address shown by their coordinator software without verifying it on the hardware device. A compromised coordinator can substitute an attacker-controlled address. A hardware wallet that knows the whole multisig wallet builds the address itself and shows it on its own screen, where malware on your computer can’t change it. Verify every new receive address on at least one such device before sharing it with anyone or sending funds to it, ideally one that stores the wallet you registered, such as the Coldcard or the Keystone. A Trezor builds the address from the keys Sparrow sends with each request, so on a Trezor also compare those keys with your descriptor.

Trying to Rebuild the Wallet Without the Descriptor
To find your coins, wallet software must rebuild your addresses, and that takes every xpub plus the threshold, the script type and the derivation paths. Get one setting wrong and the rebuilt wallet looks empty. Sparrow and most coordinators sort the keys by the rule in BIP 67 (written sortedmulti in the descriptor), so the order in which you add them doesn’t change the addresses; a wallet built with plain multi() does depend on the order. The descriptor records all of this, including which rule your wallet uses, so you never have to work it out by hand. That is why a copy goes with every seed.
Using a Single Coordinator Without Independent Verification
Relying on a single instance of coordinator software without ever cross-checking against a second tool creates a blind spot. If the coordinator has a bug or has been tampered with, you might not realize it until funds are at risk. Periodically import your wallet descriptor into a second program that accepts descriptors (for example, a watch-only wallet in Bitcoin Core) and verify that both generate the same set of addresses. This cross-validation catches software-specific issues before they cause damage.
Frequently Asked Questions
How long does it take to set up a 2-of-3 multisig wallet from scratch?
For a first-time setup including device initialization, seed generation, metal backup stamping, wallet creation, address verification, descriptor export, and a full test transaction cycle, expect to spend four to six hours. Subsequent setups go faster because you are familiar with the workflow. Do not rush the initial setup -- errors made during configuration are difficult to detect later and can result in an unrecoverable wallet or a false sense of security.
Can I mix hardware wallet brands in a single multisig setup?
Yes, and you should: use a different maker for each key, for example Coldcard, Trezor and Keystone. In a 2-of-3, two devices from one maker would let a single flaw expose the two keys a thief needs. This is a real risk: in July 2026 a Coldcard firmware flaw made seeds generated on affected firmware far easier to guess. Every device derives keys and signs by the same Bitcoin standards, so mixing brands works; check that your coordinator supports each device before you buy.
What is the difference between a wallet descriptor and a seed phrase?
A seed phrase is the word backup of one signing device: the device derives its private keys from it, so in a 2-of-3 each seed brings back one of the three keys. A wallet descriptor is a technical specification that defines how multiple keys combine to form a multisig wallet. It includes all cosigner xpubs, derivation paths, the script type, and the quorum requirement (e.g., 2-of-3). You need seed phrases to sign transactions, and you need the wallet descriptor (or all N seed phrases plus the correct threshold, script type and derivation paths) to reconstruct the wallet and locate your funds.
Should I store my wallet descriptor with my seed phrases?
Yes: keep a copy with each seed backup. If one key is lost, the two seeds you still have can’t rebuild the wallet without the descriptor, so any two locations together must hold two seeds and a descriptor. The trade-off is privacy: whoever finds a seed and its descriptor can see your whole balance and history, although one seed still can’t spend. Keep each location as private and secure as the seed inside it.
What do I do if one of my hardware wallets breaks?
If you have the seed phrase backup for the broken device, restore the seed onto a replacement device that accepts its kind of backup (a Trezor’s default 20-word backup needs another Trezor or a wallet that supports SLIP-39), register the wallet on it again if the device stores multisig wallets, and verify it produces the same xpub and can sign transactions within your multisig. If you have lost the seed phrase for the broken device but still have two functioning devices (meeting the 2-of-3 quorum), immediately create a new 2-of-3 wallet with three fresh keys and move all funds to it, signing with your two working devices and the descriptor. Operating a 2-of-3 multisig with only two functional keys leaves zero margin for further failure.

Related Resources
- Bitcoin Custody Security: Multi-Sig Setup Guide
- Hardware Wallet Buying Guide 2026
- Bitcoin Multisig: From Beginner to Expert
- The Complete Guide to Bitcoin Seed Phrase Security
- Multisig Wallet: Security vs Usability