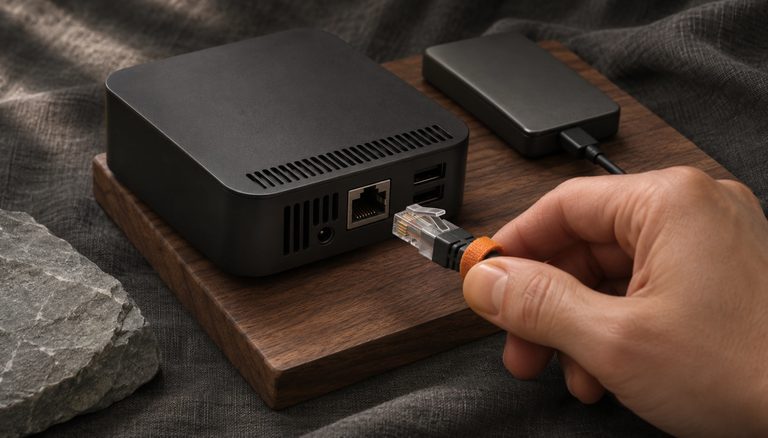
The journey of running a Bitcoin full node represents one of the most fundamental ways to participate in the Bitcoin network’s decentralized architecture. This comprehensive analysis explores the technical intricacies, challenges, and best practices of implementing and maintaining Bitcoin full nodes, while examining their crucial role in the network’s security and resilience.
The foundation of Bitcoin’s decentralized nature rests upon its network of full nodes, each downloading and checking every block for itself. These nodes serve as the backbone of the Bitcoin network, independently verifying transactions and blocks while enforcing the protocol’s consensus rules. Understanding the technical requirements and common implementation challenges is crucial for anyone seeking to contribute to the network’s robustness.
Hardware considerations play a pivotal role in successful node operation. The growth of the Bitcoin blockchain, about 800 GB of blocks as of November 2026 and about 80 GB more each year, necessitates careful attention to storage solutions. Solid-state drives (SSDs) have become the preferred storage medium due to their superior read/write speeds and reliability compared to traditional hard disk drives. However, not all SSDs are created equal, and factors such as interface type, endurance rating, and power requirements can significantly impact node performance.

System resource management represents another critical aspect of node operation. The initial block download (IBD) process, commonly known as chain synchronization, places substantial demands on both storage and computational resources. This process requires efficient handling of disk I/O operations, network bandwidth, and memory usage. Modern implementations must balance these resources while maintaining system stability throughout the synchronization process.
Network connectivity and configuration present their own set of challenges. Port forwarding, firewall settings, and bandwidth limits decide whether other nodes can reach yours and how much it uploads. Accepting incoming connections lets other nodes download blocks from yours; your own first sync downloads from the node’s outgoing connections either way.
Operating system compatibility and optimization play crucial roles in node stability. Different operating systems handle resource allocation, file systems, and process management in unique ways that can impact node performance. Linux-based systems, particularly purpose-built distributions for node operation, often provide superior stability and resource utilization compared to general-purpose operating systems.
Database management within Bitcoin Core represents a complex aspect of node operation. The software maintains several databases, including the chain state (the UTXO set, the list of unspent coins), the block index and, if you turn it on, a transaction index. Corruption in these databases can lead to synchronization failures and system crashes. Understanding database maintenance procedures, including reindexing and recovery operations, is essential for troubleshooting node issues.
Security considerations extend beyond basic system hardening. Node operators must consider physical security, network security, and protection against various attack vectors. This includes implementing proper backup procedures, monitoring system resources, and maintaining up-to-date software versions to address security vulnerabilities.
The future of full node operation faces several challenges and opportunities. As the blockchain continues to grow, storage optimization techniques and pruning options become increasingly important. Developments in hardware technology, particularly in storage and processing capabilities, will influence the accessibility of full node operation for average users.
Looking forward, innovations in node implementation continue to evolve. Projects exploring alternative database structures, improved synchronization methods, and enhanced security measures promise to make node operation more efficient and accessible. The integration of Lightning Network nodes with traditional full nodes also presents new considerations for resource allocation and system architecture.
The importance of maintaining a robust network of full nodes cannot be overstated. These nodes collectively ensure the network’s decentralization, enforce consensus rules, and provide critical services to the Bitcoin ecosystem. As the network continues to grow, the role of individual node operators in maintaining this infrastructure becomes increasingly valuable.
In conclusion, successful Bitcoin full node operation requires a thorough understanding of various technical components and their interactions. From hardware selection to system configuration, each aspect demands careful consideration and ongoing maintenance. As the Bitcoin network evolves, node operators must stay informed about best practices and emerging technologies while contributing to the network’s decentralization and security.
Step-by-Step Guide
Setting up a Bitcoin full node requires methodical preparation across hardware, software, and networking layers. These steps cover the process from initial hardware selection through a fully operational and well-connected node.
- Select appropriate hardware
Choose a dedicated machine with at least 4 GB of RAM (8 GB recommended for faster IBD), a multi-core processor from the last decade, and a 2 TB SSD: a synced archival node takes about 900 GB as of November 2026 and grows about 80 GB a year. An NVMe drive inside the machine is fastest; never put the blockchain on a hard drive or a microSD card. A Raspberry Pi 5 with 8 GB of RAM and a USB 3 SSD works for budget setups, but a small form-factor PC provides noticeably better performance.
- Install a Linux-based operating system
Ubuntu Server LTS or Debian Stable provide reliable foundations for node operation. Install the OS with minimal packages to reduce attack surface. During installation, configure full-disk encryption using LUKS if the machine will also store wallet data. Set up a non-root user account with sudo privileges for day-to-day administration, and disable root login via SSH.
- Download and verify Bitcoin Core
Obtain the latest Bitcoin Core release from bitcoincore.org. Verify the download using PGP signatures and SHA256 checksums as described in the software verification process. Extract the binary package and copy the executables to
/usr/local/bin/or install from the provided package. Confirm the installation withbitcoind --version. - Configure bitcoin.conf
Create the configuration file at
~/.bitcoin/bitcoin.conf. Key settings to include:server=1to enable RPC,listen=1to accept incoming connections,dbcache=4096(adjust based on available RAM) to speed up IBD,maxuploadtarget=5000to keep uploads under about 5,000 MiB per 24 hours, andprune=0for a full archival node orprune=550for a pruned node if storage is limited. - Configure network access and port forwarding
Open TCP port 8333 on your router and point it to your node’s local IP address. On the node itself, configure the firewall with
ufw allow 8333/tcpandufw allow ssh. Assign a static IP to the node on your local network via DHCP reservation in your router settings. Once the node is synced and has run for a while, check that other nodes reach it:bitcoin-cli getnetworkinfoshould showconnections_inabove 0. - Start the initial block download
Launch bitcoind with
bitcoind -daemon. Monitor progress withbitcoin-cli getblockchaininfoand check theverificationprogressfield. The IBD process typically takes a day or two on a mini-PC with a fast NVMe drive and two to four days on a Raspberry Pi 5, depending on hardware and internet speed. During this period, the node will consume significant CPU, disk I/O, and bandwidth. Avoid running other resource-intensive applications on the same machine during IBD. - Set up bitcoind as a system service
Create a systemd service file at
/etc/systemd/system/bitcoind.serviceto ensure the node starts automatically on boot and restarts after crashes. Set appropriate resource limits, file descriptor limits (LimitNOFILE=32768), and the correct user/group. Enable the service withsystemctl enable bitcoindand manage it through standard systemd commands. - Monitor and maintain the node
Regularly check node status with
bitcoin-cli getnetworkinfoandbitcoin-cli getpeerinfo. Monitor disk usage since the blockchain grows by about 80 GB a year. Set up log rotation for the debug.log file. Plan for Bitcoin Core upgrades by subscribing to release announcements and repeating the verification process with each update.

Common Mistakes to Avoid
Using an HDD Instead of an SSD
Traditional spinning hard drives cannot keep up with the random read/write patterns required during blockchain synchronization and normal node operation. Nodes running on HDDs experience IBD times measured in weeks rather than days, and ongoing operation suffers from slow block validation. The price difference between a 2 TB HDD and SSD no longer justifies the performance penalty. Always use an SSD, preferably with an NVMe interface.
Setting dbcache Too Low During Initial Sync
Since Bitcoin Core 31.0, the default dbcache is 1,024 MiB on a 64-bit computer with at least 4 GB of RAM (450 MiB otherwise). That is still small for the initial sync: each time the cache fills up, Bitcoin Core has to write it out to disk, and its own documentation warns that a lower dbcache makes the initial sync much longer. If your system has 8 GB or more of RAM, setting dbcache=4096 during the initial sync keeps far more of the UTXO set (the list of unspent coins that every new transaction is checked against) in memory, so the node writes to disk far less often. After IBD completes, you can lower this value to reduce memory usage.
Not Configuring Port 8333 for Incoming Connections
A node that only makes outgoing connections (limited to 10 peers by default) contributes less to network health than one that also accepts incoming connections (Bitcoin Core 32.1 allows 200 connections in total by default, so up to 189 incoming). Many operators skip port forwarding configuration, resulting in a node that benefits from the network but gives back minimally. Check your node’s connection count with bitcoin-cli getconnectioncount, and once it is synced, confirm that incoming connections arrive: connections_in in bitcoin-cli getnetworkinfo should be above 0.

Running the Node Without a UPS or Graceful Shutdown Process
Abrupt power loss during block validation or database writes can corrupt the chainstate or block index databases. Recovery requires a full reindex, which can take many hours. A basic uninterruptible power supply (UPS) with USB monitoring allows the system to shut down gracefully during power outages. Alternatively, configure your node on a system with a battery backup and automated shutdown scripts.
Neglecting to Update Bitcoin Core
Running outdated versions of Bitcoin Core exposes your node to known vulnerabilities and misses performance improvements. Each release includes bug fixes, security patches, and efficiency gains. Check the version your node is running with bitcoin-cli getnetworkinfo (the subversion field) and compare it against the latest release. Plan updates within a few weeks of each new release, following the full verification process for every download.
Frequently Asked Questions
How much bandwidth does a Bitcoin full node consume monthly?
Once synced, bitcoin.org puts downloads at about 20 GB a month and says it is common for full nodes on high-speed connections to upload 200 GB or more a month; much of that upload is old blocks served to nodes doing their own first sync. The first sync itself downloads about 800 GB once (as of November 2026). You can limit uploads with the maxuploadtarget setting in bitcoin.conf. Setting it to 5000 aims to keep uploads under about 5 GB a day (5,000 MiB). It is a target, not a hard cap: when the node gets close, it stops serving blocks older than a week but keeps relaying new blocks and transactions.

Can I run a Bitcoin full node on a Raspberry Pi?
Yes. Choose a Raspberry Pi 5 with 8 GB of RAM and a 2 TB SSD, on USB 3 or on an NVMe base board, never the microSD card. A Pi 4 can also run a node: Umbrel calls it fine for tinkering but recommends the Pi 5, because USB drives can make a Pi 4 crash, and RaspiBlitz no longer recommends the Pi 4 either. The first sync takes roughly two to four days on a Pi 5 and longer on a Pi 4. Node platforms like Umbrel and RaspiBlitz simplify the setup on Raspberry Pi hardware.
What is a pruned node and does it still validate all transactions?
A pruned node downloads and validates the entire blockchain history but discards old block data after processing, keeping only the most recent blocks and the full UTXO set. With prune=550 (the minimum, in MiB), the node retains only about 550 MB of block data. Pruned nodes perform full validation of every transaction and block, providing the same security guarantees as archival nodes. The trade-off is that pruned nodes cannot serve historical block data to peers performing IBD.
How do I know if my node is fully synced?
Run bitcoin-cli getblockchaininfo: blocks should equal headers and match the current block height on a block explorer like mempool.space, and verificationprogress should show 1 (or a value just below it for a moment as a new block arrives). The initialblockdownload field turns false when the first sync ends, but then stays false until a restart, even if the node later falls behind, so don’t rely on it alone. Once synced, the node receives and validates new blocks in real-time, typically within seconds of their propagation across the network.

Should I run Bitcoin Core with Tor for privacy?
With all its connections going through Tor, Bitcoin Core hides your home IP address from your peers, and your ISP sees connections to Tor rather than to Bitcoin peers. Tor cannot stop an observer who watches both ends from matching the timing of your traffic. Configure Tor by installing the Tor daemon and adding proxy=127.0.0.1:9050 to bitcoin.conf. With a proxy set, Bitcoin Core stops accepting incoming connections, but the listen=1 line from step 4 switches that back on, so delete it: otherwise your node keeps accepting connections at your home IP address on port 8333. For a Tor-only setup, add onlynet=onion and dnsseed=0. Be aware that Tor-only nodes may experience slower initial sync and fewer peer connections. A hybrid setup that connects to clearnet peers directly and uses Tor only for onion peers is faster, but it does not hide your node: those clearnet peers see your home IP address, and your ISP sees your connections to them.
Related Resources
- Run a Bitcoin Node: Full Setup Guide
- Bitcoin Node Infrastructure: Security Setup
- Home Bitcoin Node: Privacy and Setup Guide
- Bitcoin Node Software: Core vs Alternatives
- Self-Custody Bitcoin: Node and Wallet Setup